

Mushroom Grow Kit – Pocket Oyster (Pleurotus geesterani) no shipping to WA
$34.95
24 in stock (can be backordered)
Description
🍄 Pocket Oyster Ready-to-Fruit Mushroom Kit Guide
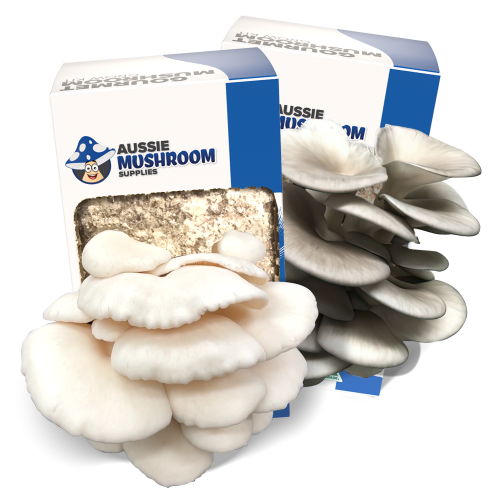
Pocket Oysters (Pleurotus geesterani), also known as the “pocket-sized oyster,” are a fantastic and incredibly easy-to-grow mushroom! First described by mycologist Rolf Singer in 1962, this adorable, petite oyster variety has gained massive popularity in China (where it’s known as 秀珍菇, xiùzhēn gū) for its intensely delicious, savoury umami flavour.
If you are looking for a beginner-friendly, reliable side-fruiting producer that yields beautiful, tasty clusters, this is the perfect kit for you!
🛠️ Getting Started: The First Flush Pocket Oysters are side-fruiters, meaning they love to grow straight out of the side of the bag. The easiest way to fruit them is to leave the bag right inside its cardboard box!
-
Step 1: Prep the Box – Remove the perforated cut-out from the front of your kit box to expose the plastic bag inside.
-
Step 2: Score the Bag – Using a sterilised knife (wiped with isopropyl alcohol or heated with a flame), cut an “X” into the plastic mushroom bag. Make the “X” roughly the same size as the hole in the box.
-
Step 3: Keep it Humid – Mist (give it a light spritz) 1 to 3 times per day with filtered or cooled boiled water. Crucial tip: Only spray the outside of the plastic flaps to create humidity; don’t spray the substrate block directly!
🌤️ Ideal Growing Environment
-
Temperature: Pocket Oysters are very forgiving and love a mild climate! Aim for a stable room temperature between 15-24°C to fruit.
-
Light: Mushrooms need enough natural, indirect light to read a book by. Don’t lock them in a dark, confined space or cupboard, or they will grow long and skinny looking for the sun.
-
Humidity: Keep it high, ideally over 70-80%. The plastic flaps from your “X” cut will help trap this moisture beautifully.
🍄 Tips & Troubleshooting
-
Rapid Growth: Just like standard oysters, these are fast movers! Once they start pinning, they will double in size rapidly, so keep a close eye on them.
-
Watch the watering: Once your mushrooms actually start forming (fruiting), avoid misting the fruits directly to prevent bacterial blotch. Just mist the plastic flaps.
-
Fruiting in the wrong spot? If you notice mushrooms trying to fruit underneath the plastic instead of out of your “X” cut, your room is too dry. The mushrooms are seeking the trapped moisture inside the bag.
🔪 Harvesting
-
When to pick: The best time to harvest is when the edges of the tiny caps are still curled slightly downward. As soon as the caps start to roll outward and upward, the mushroom is about to drop its spores. You want to harvest just before this happens!
-
How to pick: Harvest the whole cluster at once by gently twisting the mushrooms away from the block.
-
Clean up: Make sure you remove all leftover bits of mushroom flesh from the block so nothing is left behind to spoil.
♻️ Preparing for Later Flushes
-
Rest Period: After your first harvest, let the block rest for 2 to 3 weeks before you start misting it with water again. Later flushes always take a little longer to come through!
-
Rehydrating: If your block feels really light after that first flush and rest period, it needs a good drink.
-
Remove the block from the box.
-
Submerge the bag in cold water for 5-12 hours to rehydrate it.
-
The next day, tip out any excess water.
-
Put the bag back into the box, but face it the other way (so the old “X” is at the back).
-
Cut a brand new “X” on this fresh side and resume misting!
-
Please note this culture is sold with our Mushroom Spawn and Cultures sale agreement. By purchasing you agree to this agreement
Related products
- Free shipping
- Free shipping
- Free shipping
- Free shipping


Reviews
There are no reviews yet